![]()
Version : Sitecore Experience Platform 9.0 rev. 171219 (9.0 Update-1)
Topology: XP Single (XP0)
Solr Version: Solr 6.6.2
Let’s split the Sitecore 9 installation into three parts,
- Look at Prerequisites
- Install Solr with Https
- Install Sitecore 9 with Sitecore Installation Framework (SIF)
First download the required tools and packages,
Download the XP0 package from Sitecore download page.

Extract the newly downloaded package and observe there would be three .zip files.

First two are for Sitecore website and xConnect respectively. Last one consists of configuration files (with .json extensions)
Extract the files from XP0 Configuration files 9.0.1 rev. 171219.zip
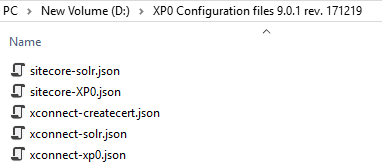
Copy first two zip files and the extracted configuration files to single folder.

Install SIF:
Sitecore Install Framework (SIF) can be downloaded through Sitecore PowerShell gallery or manually from SIF downloads page.
Here let’s take approach of installing it through PowerShell gallery.
Open PowerShell command window as admin, and run the following commands
1. Register the Repository
Register-PSRepository -Name SitecoreGallery -SourceLocationhttps://sitecore.myget.org/F/sc-powershell/api/v2
2. Install Framework module
Install-Module SitecoreInstallFramework
3. Install Fundamentals module
Install-Module SitecoreFundamentals

License File
Copy the Sitecore license file to the same folder (D:9).
Installation Script
There is an installation script present in Installation Guide (page: 28). Copy the script and save it as Sitecore901install.ps1 to the D:9 folder.
This file contains hidden or bidirectional Unicode text that may be interpreted or compiled differently than what appears below. To review, open the file in an editor that reveals hidden Unicode characters.
Learn more about bidirectional Unicode characters
| #define parameters | |
| $prefix = "sc901demo" | |
| $PSScriptRoot = "D:\9" | |
| $XConnectCollectionService = "$prefix.xconnect" | |
| $sitecoreSiteName = "$prefix.local" | |
| $SolrUrl = "https://localhost:8983/solr" | |
| $SolrRoot = "C:\Sitecore9\solr-6.6.2" | |
| $SolrService = "solr662" | |
| $SqlServer = "(local)" | |
| $SqlAdminUser = "sa" | |
| $SqlAdminPassword="sa" | |
| #Install client certificate for xConnect | |
| $certParams = @{ | |
| Path = "$PSScriptRoot\xconnect-createcert.json" | |
| CertificateName = "$prefix.xconnect_client" | |
| } | |
| Install-SitecoreConfiguration @certParams -Verbose | |
| #Install Solr cores for xDB | |
| $solrParams = @{ | |
| Path = "$PSScriptRoot\xconnect-solr.json" | |
| SolrUrl = $SolrUrl | |
| SolrRoot = $SolrRoot | |
| SolrService = $SolrService | |
| CorePrefix = $prefix | |
| } | |
| Install-SitecoreConfiguration @solrParams | |
| #Deploy xConnect instance | |
| $xconnectParams = @{ | |
| Path = "$PSScriptRoot\xconnect-xp0.json" | |
| Package = "$PSScriptRoot\Sitecore 9.0.1 rev. 171219 (OnPrem)_xp0xconnect.scwdp.zip" | |
| LicenseFile = "$PSScriptRoot\license.xml" | |
| Sitename = $XConnectCollectionService | |
| XConnectCert = $certParams.CertificateName | |
| SqlDbPrefix = $prefix | |
| SqlServer = $SqlServer | |
| SqlAdminUser = $SqlAdminUser | |
| SqlAdminPassword = $SqlAdminPassword | |
| SolrCorePrefix = $prefix | |
| SolrURL = $SolrUrl | |
| } | |
| Install-SitecoreConfiguration @xconnectParams | |
| #Install Solr cores for Sitecore | |
| $solrParams = @{ | |
| Path = "$PSScriptRoot\sitecore-solr.json" | |
| SolrUrl = $SolrUrl | |
| SolrRoot = $SolrRoot | |
| SolrService = $SolrService | |
| CorePrefix = $prefix | |
| } | |
| Install-SitecoreConfiguration @solrParams | |
| #Install Sitecore instance | |
| $sitecoreParams = @{ | |
| Path = "$PSScriptRoot\sitecore-XP0.json" | |
| Package = "$PSScriptRoot\Sitecore 9.0.1 rev. 171219 (OnPrem)_single.scwdp.zip" | |
| LicenseFile = "$PSScriptRoot\license.xml" | |
| SqlDbPrefix = $prefix | |
| SqlServer = $SqlServer | |
| SqlAdminUser = $SqlAdminUser | |
| SqlAdminPassword = $SqlAdminPassword | |
| SolrCorePrefix = $prefix | |
| SolrUrl = $SolrUrl | |
| XConnectCert = $certParams.CertificateName | |
| Sitename = $sitecoreSiteName | |
| XConnectCollectionService = "https://$XConnectCollectionService" | |
| } | |
| Install-SitecoreConfiguration @sitecoreParams |
Update the parameters (in the above script, line number 2 to 11), as per your setup.
Sitecore 9 Installation
Now we are ready with tools and packages, let’s get to installation.
In a PowerShell command line, navigate to the D:9 folder and run the following command:
.Sitecore901install.ps1


Post Installation Steps
There are few post installation steps needs to be followed from Installation Guide (page number:38)
- Rebuild the Search Indexes and the Link Databases
- Deploy Marketing Definitions
- Content Expiration
- Configure Tracking
- Configure Session State Providers
Happy Learning 🙂

From where to get license file?
LikeLike