By this time, we have latest version (8.2) of Sitecore running in local. It’s ok to install using either of the three approaches, web application installer, or manual installation, or using SIM.
Before going ahead to create .NET web application, it’s good to have a look at Sitecore launch pad, different components, and the content tree structure.
For any application, to open Sitecore, we need to append /sitecore to the URL. In my case, URL is http://testsitecore/, so to open Sitecore click on http://testsitecore/sitecore.

To login to Sitecore, default Administrator credentials are as below
username: admin
password: b
Once we login, we can see the Sitecore Launchpad,

In the Launchpad, we can see there are 4 sections,
- Marketing Applications: This section contains, all the components relate to Digital Marketing suite. These are the main components using which marketers can connect better with customers.
- Content Editing: This section is the main heart of the CMS. Using these components, Content Authors can add, edit, or delete the content.
- Control Panel: As the name suggests, using these components, we can do the administrative activities, like Search indexing manager, clean up databases, and localization.. etc.
- Access Management: This section contains all the user, role, and security related components.
Now we look into some of the main components,
- Content Editor: This is where Content Authors manage content. They can either add, edit, or delete the content. As a developer, we frequently access this to create templates, rendering, and placeholders etc. In this all items are displayed in tree structure.

- Experience Editor: Here Content Authors can create/modify the content in the live mode. In previous Sitecore versions this was called Page Editor.

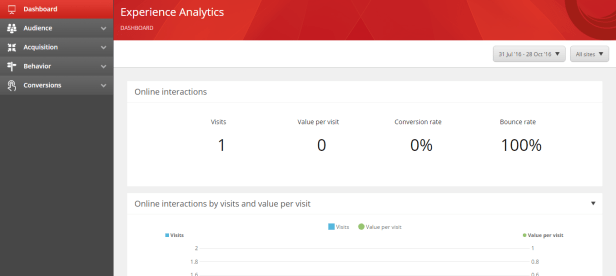
- Experience Analytics: This section contains more of reports, like Channel groups by visits, Top campaigns by value, Top goals by conversions, etc.
In the next post, we will look into how to create a .NET web project for Sitecore.
Happy Learning 🙂
